人脸检测
运行于Windows11平台:
    import cv2
    import time

    # 加载人脸检测的 Haar 特征分类器
    face_cascade = cv2.CascadeClassifier(cv2.data.haarcascades + 'haarcascade_frontalface_default.xml')

    # 打开摄像头
    cap = cv2.VideoCapture(0)

    # 获取摄像头分辨率
    frame_width = int(cap.get(cv2.CAP_PROP_FRAME_WIDTH))
    frame_height = int(cap.get(cv2.CAP_PROP_FRAME_HEIGHT))
    print(f"当前分辨率: {frame_width}x{frame_height}")

    # 初始化帧率计算
    fps = 0
    prev_time = time.time()

    while True:
        # 读取摄像头画面
        ret, frame = cap.read()
        if not ret:
            break

        # 将图像转换为灰度图
        gray = cv2.cvtColor(frame, cv2.COLOR_BGR2GRAY)

        # 检测人脸
        faces = face_cascade.detectMultiScale(gray, scaleFactor=1.1, minNeighbors=5)

        # 在检测到的人脸周围绘制矩形框
        for (x, y, w, h) in faces:
            cv2.rectangle(frame, (x, y), (x + w, y + h), (255, 0, 0), 2)

        # 计算并显示帧率
        current_time = time.time()
        fps = 1 / (current_time - prev_time)
        prev_time = current_time
        cv2.putText(frame, f'FPS: {int(fps)}', (10, 30), cv2.FONT_HERSHEY_SIMPLEX, 1, (0, 255, 0), 2)

        # 显示结果
        cv2.imshow('Face Detection', frame)

        # 按 'q' 键退出
        if cv2.waitKey(1) & 0xFF == ord('q'):
            break

    # 释放摄像头并关闭窗口
    cap.release()
    cv2.destroyAllWindows()
由于树莓派系统更新后,官方不再提供camera驱动,而是使用Linux平台libcamera替代,且OpenCV部分还未能适配libcamera库,则不能使用常规的cv2.Capture(0)开启摄像头。
采用libcamera搭配cv2库替代:
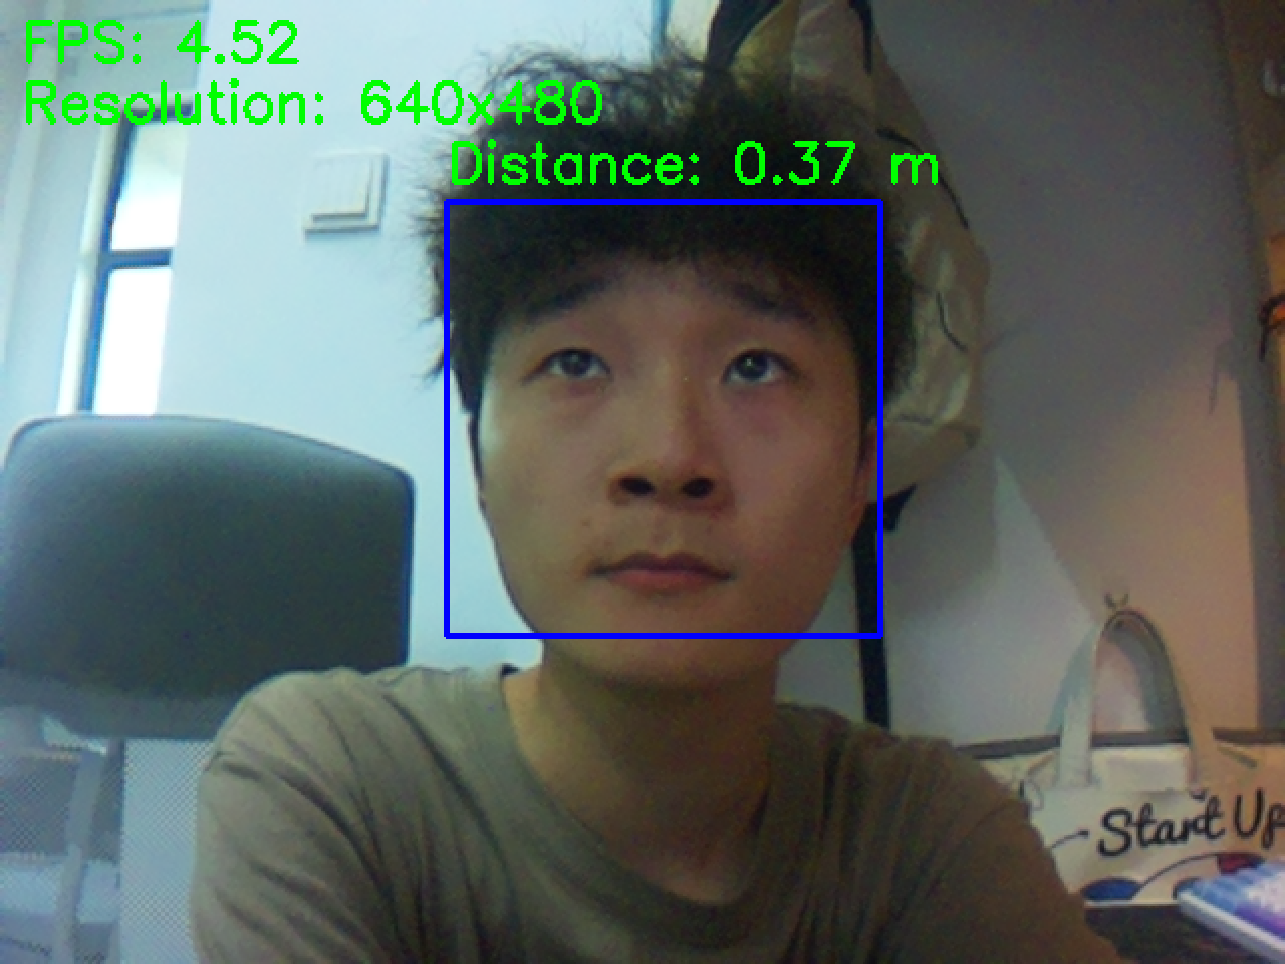
目标跟踪&距离估算
单目摄像头需要根据已知实际物体大小来估算具体位置,如估算脸宽0.15m,camera视角范围62.2°(实际应该是160°,但经过裁剪,故估算62.2°左右)

帧率属实堪忧😅。
import math
import cv2
import time
from picamera2 import Picamera2

# Set known parameters
W = 0.15  # Actual face width (in meters)
FOV_x = 62.2  # Horizontal field of view (in degrees)
image_width = 640  # Image width (in pixels)

# Initialize the camera
picam2 = Picamera2()
picam2.configure(picam2.create_preview_configuration(main={"size": (image_width, 480)}))
picam2.start()

# Load the Haar Cascade for face detection
face_cascade = cv2.CascadeClassifier('haarcascade_frontalface_default.xml')

# Initialize variables for FPS calculation
prev_time = time.time()
fps = 0

while True:
    # Capture the frame
    frame = picam2.capture_array()

    # Fix BGR to RGB color inversion
    frame = cv2.cvtColor(frame, cv2.COLOR_BGR2RGB)

    gray = cv2.cvtColor(frame, cv2.COLOR_RGB2GRAY)
    faces = face_cascade.detectMultiScale(gray, scaleFactor=1.1, minNeighbors=5, minSize=(30, 30))

    # Calculate the focal length
    FOV_x_rad = math.radians(FOV_x)
    focal_length = (image_width / 2) / math.tan(FOV_x_rad / 2)

    for (x, y, w, h) in faces:
        face_width = w
        # Estimate the distance
        distance = (focal_length * W) / face_width

        # Draw the detected face and display the distance
        cv2.rectangle(frame, (x, y), (x+w, y+h), (255, 0, 0), 2)
        cv2.putText(frame, f"Distance: {distance:.2f} m", (x, y - 10), cv2.FONT_HERSHEY_SIMPLEX, 0.9, (0, 255, 0), 2)

    # Calculate and display FPS
    current_time = time.time()
    fps = 1 / (current_time - prev_time)
    prev_time = current_time
    cv2.putText(frame, f"FPS: {fps:.2f}", (10, 30), cv2.FONT_HERSHEY_SIMPLEX, 0.9, (0, 255, 0), 2)

    # Display resolution
    resolution_text = f"Resolution: {frame.shape[1]}x{frame.shape[0]}"
    cv2.putText(frame, resolution_text, (10, 60), cv2.FONT_HERSHEY_SIMPLEX, 0.9, (0, 255, 0), 2)

    # Show the camera feed
    cv2.imshow("Camera", frame)

    # Break the loop if 'q' is pressed
    if cv2.waitKey(1) & 0xFF == ord('q'):
        break

# Cleanup
cv2.destroyAllWindows()
picam2.stop()
帧率优化:
使用树莓派官方提供的Linux raspberry OS使用OpenCV人脸检测仅仅达到3帧左右,帧率堪忧,还有很多需要优化的地方
